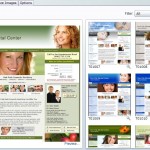
 Select your dental website design from a wide range of style and color options. Plus, you can further customize your design choice by changing virtually all the images to anything in our built-in image library or to your own images that you have uploaded to your image file locker – click on the “Customize Images” tab.
Here you can also customize the animated banner message on your home page – just click on the “Options” tab.
Enter your dental practice name exactly as you want it to appear in the animation. You can also add an optional certification – such as “board-certified orthodontist” or other short phrase.
Many doctors put “General Dentist” in this box for legal reasons if they are providing more specialized services, such as braces or dentures, but are not board-certified specialists.
Next, select the three “slogans” lines that you want to appear in your home page masthead animation. You can select from our pre-written library of suggestions or write your own.
Customize your Dental Website Design
The “Portal Design” area in the “Customize Portals” section gives you total control of the look and feel of your website. The first tab you’ll see is “Choose a Skin.” Whatever skin you choose will be the basic design template for your entire website.
On the right hand side, you’ll see a library of website skins. You can use the drip-down “Filter” menu to limit your results to specific skins ÔÇô for example, filter for blue designs. If you see one that you like, you can mouse over the magnifying glass icon to see a larger image. Or, select a skin and then click “Preview” to open up a new browser window and see a sample website with this skin design. If you decide you like it, just click the “Select” button. Your new skin will appear under “Selected Skin,” and your entire website will instantly be updated. You can always change the skin of your website with the click of a button.
Customize Images
The next tab is “Customize Images.” Each skin automatically includes default stock images, but every image is listed here.┬á You can change any image you want, either to a different stock photo, or to your own custom image. Use the drop-down “Filter” menu in the upper right corner to choose which category of images you want to edit. You’ll see a list of all images in that category.┬á This is designated by a thumbnail of the image and a description of its website location, its dimensions, and other details. If you’re not sure just where this image shows up on your website, click “Show Me” to see an example. You can click “View” to see the full-size version of the image.
If you want to change an image, just click the pencil icon all the way on the right hand side. We have a huge library of stock photos for you to choose from. You can use the drop-down “Category” selector to filter the stock photos. If you don’t want to use our “Stock Images,” you can even upload your own by clicking the “My Images” tab ÔÇô just be sure to select an image that is the right size.
Choose a skin
Now, if you go back to the “Choose a Skin” tab and change to a different skin, the customized images you specified in the “Customize Images” tab will be overwritten with the default images for the new skin you select. So, before you spend a lot of time customizing your images, make sure you’re happy with the skin you’ve selected.
The “Options” tab is important for determining the header of your website. Enter the “Practice Name” as you want it to appear on the website. You can also add “Certification” text like “General Dentist.” Finally, you can also change the slogans that appear in your Flash header. You can write your own, but make sure to keep them short so they will display properly.
Finally, you’ll want to head over to your website to see how it looks! Any website design changes you make in the Control Panel will be reflected on your live site almost instantly. If there are any further changes you want to make, just head on back to the “Portal Design” area in the “Customize Portals” section until you’re 100% satisfied.